What is the “MFT” Windows forensic artifact?
The Master File Table (MFT) is the central and most critical component of the New Technology File System (NTFS). It is essentially a database that contains information about every file and directory on an NTFS volume. The MFT itself is a file, named $MFT, and is typically the very first file on the partition. It contains a series of records, where each record corresponds to a specific file or directory and stores its metadata, such as filename, size, timestamps, security permissions, and, for very small files, the file’s actual data content.
From a DFIR perspective, the MFT is arguably the most important artifact on an NTFS file system. Each MFT entry provides a complete set of metadata for a file, including its four main timestamps (Modified, Accessed, Changed, and Born/Created), which are fundamental to building a timeline of events. Investigators can analyze the MFT to identify recently created, modified, or accessed files, which may point to malware installation or data staging. Furthermore, when a file is deleted, its MFT record is often only marked as “inactive” but is not immediately overwritten. This allows forensic tools to parse the MFT and recover a significant amount of information about deleted files, including their original name, size, and sometimes even their full content, making it essential for recovering evidence that an attacker has tried to destroy.
Collecting, Decoding, and Viewing “MFT” with TensorGuard
- Create a TensorGuard account and sign in to the TensorGuard console at https://app.tensorguard.com.
- Select “Case Manager”, then the plus button to create a case. This will contain your enrolled devices, their reports, and any manually submitted collections.
- Linked inside the case menu, download the TensorGuard Forensic Collector and run it on your target system.
- In the console, click the plus button for “New Enrollment”, copy the enrollment key, and paste it into the TensorGuard Forensic Collector on your target device.
- Now that you have a device enrolled, select the device(s), and click “Send Signal”. Answer the questions regarding what you want to look for in the analysis, any alerting on positive findings, and if the collection and analysis should be recurring.
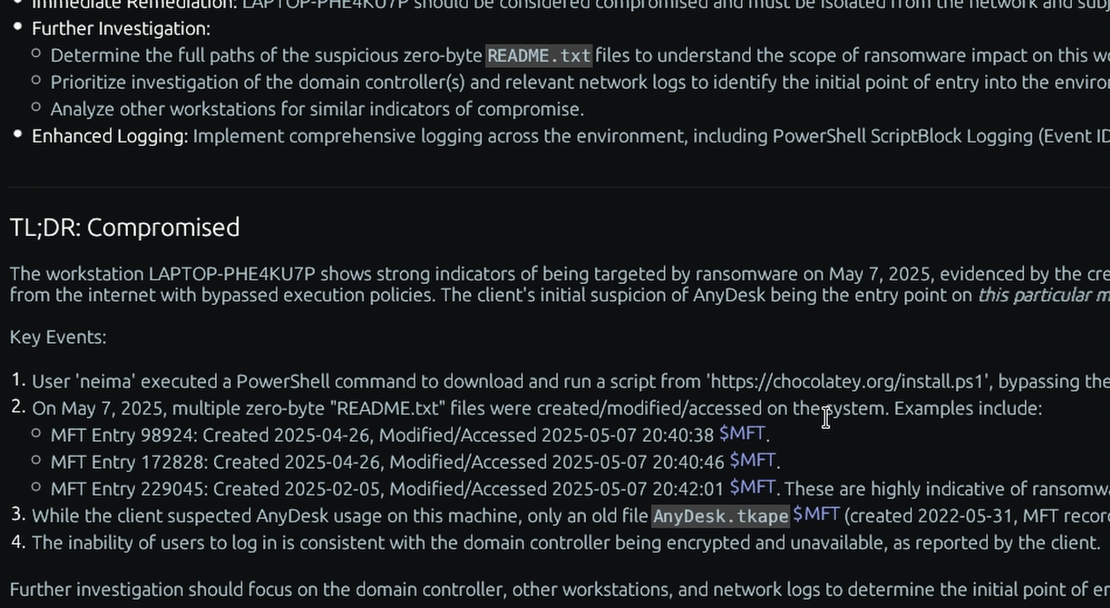
- Once the report is generated, you’ll have MFT delivered in the browser, alongside an executive summary and timeline of findings.
Get Started

MFT
Windows
A master index of every file on the disk, including critical information about deleted files.
About MFTStart with a Compromise Assessment.
The best way to see the power of TensorGuard is to use it. For a simple, flat fee, we will conduct a full, AI-powered Compromise Assessment on a selection of your critical systems.

